Mastering Deviled Eggs: Kathy Casey's Secrets for Perfect Peeling
There are few appetizers as universally beloved and nostalgically comforting as the deviled egg. A staple at picnics, potlucks, and holiday gatherings, these creamy, tangy bites are often the first to disappear from any platter. Yet, behind their unassuming charm lies a culinary challenge that has stumped home cooks for generations: the elusive perfectly peeled hard-boiled egg. A rough, pock-marked egg white can mar even the most expertly prepared filling, diminishing the visual appeal of your otherwise flawless
classic deviled eggs.
Fortunately, culinary icon Kathy Casey, author of
D'Lish Deviled Eggs: A Collection of Recipes from Creative to Classic, has cracked the code. Her foundational techniques are not just about delicious flavors but about achieving professional-looking results from the very first step. By demystifying the art of hard-cooking eggs, Casey empowers home cooks to conquer the peeling hurdle, ensuring every deviled egg you serve is a testament to both taste and presentation.
The Deviled Egg Dilemma: Why Peeling Matters for Perfection
For many, the process of making deviled eggs begins with a sigh of dread at the thought of peeling. Nothing is more frustrating than meticulously cooking your eggs, only to watch half the pristine white adhere stubbornly to the shell, tearing away in unsightly chunks. This isn't merely an aesthetic concern; ragged egg whites can compromise the texture and mouthfeel of your final product, making it harder to fill evenly and present beautifully.
Casey understands that the secret to superb
classic deviled eggs starts long before you even consider the filling. It begins with the egg itself and the precise methods used to cook and cool it. Her approach emphasizes thoughtful preparation, transforming a task often fraught with anxiety into a simple, predictable step toward culinary success. Let's delve into her golden rules for hard-boiled egg mastery.
Kathy Casey's Golden Rule: The Age of the Egg
Perhaps the most surprising, yet utterly crucial, piece of advice from Kathy Casey centers on the age of your eggs. Contrary to popular belief that fresh is always best, Casey emphatically states that for easy peeling, you should select eggs that are at least 7–10 days old from the refrigerator. Super-fresh eggs, straight from the chicken or the store shelf, are notoriously difficult to peel without significant tearing.
Why this counter-intuitive wisdom? It all comes down to the subtle changes an egg undergoes as it ages. Over time, the pH level of the egg white (albumen) increases, becoming more alkaline. Simultaneously, the small air pocket naturally present at the wide end of the egg gradually expands. This combination of an expanding air pocket and a less acidic albumen causes the inner membrane, which usually clings tenaciously to the egg white, to loosen its grip. This allows for a much smoother, cleaner separation of the shell from the cooked egg.
Think of it as nature doing some of the work for you. By choosing slightly older eggs, you're leveraging these natural processes to your advantage, significantly reducing the chances of a frustrating peel. So, next time you plan to make deviled eggs, resist the urge to buy them the day before. Plan ahead, check the carton's sell-by date, or better yet, keep a rotating stock in your fridge. For a deeper dive into this fascinating phenomenon, you might want to explore
Why Older Eggs Make Better Deviled Eggs: Kathy Casey's Expert Advice.
Beyond Age: The Art of Centered Yolks and Proper Cooking
While the age of the egg is paramount for easy peeling, Casey also offers clever tips for achieving another hallmark of professional-looking deviled eggs: perfectly centered yolks. Nothing detracts from the elegance of a deviled egg quite like a yolk pushed to one side, leaving an uneven cavity for the filling. To promote centered yolks, she recommends a simple trick: store your eggs small-end up or on their sides overnight before cooking. This helps gravity settle the yolk in the middle of the egg white, ensuring beautiful, uniform halves once cut. You can find more expert insights on this specific technique in our related article,
Centering Yolks & Easy Peeling: The Deviled Egg Pro's Secret Tips.
Once your eggs are prepped for perfect yolks, it's time for the cooking method itself. Casey's technique for hard-cooking eggs is straightforward and highly effective, designed to prevent cracking and ensure even cooking:
1.
Choose Your Pot Wisely: Place your eggs in a large nonreactive saucepan. Nonreactive materials like stainless steel or enamel prevent any metallic flavors from leaching into the eggs. A large pot ensures eggs aren't crowded, reducing the risk of cracking.
2.
Cold Water Start: Add cold water to the saucepan, ensuring the eggs are covered by at least one inch. Starting with cold water allows the eggs to gradually come up to temperature, minimizing thermal shock that can cause shells to crack. It also promotes even cooking from the outside in.
3.
Bring to a Boil: Place the saucepan over medium-high heat and bring the water to a rolling boil. Keep an eye on it to prevent over-boiling, which can make eggs rubbery.
4.
The Critical Cook & Rest: Once the water reaches a full boil, immediately remove the saucepan from the heat. Cover the pot tightly with a lid and let the eggs sit in the hot water for 12-15 minutes. This gentle residual heat cooking method is key to achieving perfectly set whites and creamy, not chalky, yolks. The exact timing can vary slightly based on egg size and desired yolk consistency (12 minutes for slightly softer yolks, 15 for fully firm).
5.
Immediate Ice Bath: As soon as the resting time is up, carefully drain the hot water and immediately transfer the eggs to a large bowl filled with ice water. This "ice bath" step is absolutely critical for stopping the cooking process and is perhaps the second most important factor (after egg age) for easy peeling. The rapid cooling causes the egg white to contract slightly, pulling away from the shell membrane, and preventing that greenish ring around the yolk often associated with overcooked eggs.
The Perfect Peel: Post-Cooking Strategies for Success
Even with the best preparation and cooking, the peeling process itself requires a delicate touch. After the eggs have thoroughly cooled in the ice bath (at least 10-15 minutes, or until completely cool to the touch), they are ready for peeling.
Here’s Casey's recommended peeling technique:
1.
Gentle Cracking: Gently tap the wide end of the egg (where the air pocket is) on a hard surface to crack it. Then, lightly roll the egg between your palms or on the counter, applying gentle pressure to create a network of fine cracks all around the shell. The more cracks, the easier the membrane will release.
2.
Peel Under Water: Many experts, including implicitly Casey's emphasis on the ice bath, recommend peeling eggs under a slow stream of cold running water or submerged in a bowl of cold water. The water helps to get under the membrane, lubricating the space between the shell and the egg white, making it incredibly easy for the shell to slip off.
3.
Start from the Air Pocket: Begin peeling from the wider end of the egg where the air pocket is located. This is typically the easiest point to get started, as the membrane is already naturally separated here.
4.
Work Carefully: Once you've removed the initial pieces of shell, continue to peel gently, allowing the water to assist in separating the membrane from the egg white. Take your time, and soon you'll have perfectly smooth, unblemished hard-boiled eggs ready for their deviled destiny.
Crafting the Classic Deviled Eggs: Filling and Finishing Touches
With your beautifully peeled, perfectly cooked egg whites in hand, the fun part truly begins: crafting the creamy, flavorful filling for your
classic deviled eggs. While Casey's book explores creative variations, the traditional filling remains a timeless favorite.
To prepare the filling:
1.
Halve the Eggs: Carefully slice each hard-boiled egg lengthwise, using a sharp, non-serrated knife for a clean cut. Gently scoop out the bright yellow yolks into a medium bowl.
2.
Mash and Mix: Mash the yolks with a fork until they are completely smooth and free of lumps. This is crucial for a velvety filling.
3.
Add Classic Flavors: Incorporate high-quality mayonnaise, a touch of Dijon mustard for tang, a splash of apple cider vinegar or pickle relish for acidity and sweetness, and season generously with salt and freshly ground black pepper. Adjust these ingredients to your taste, aiming for a balance of creamy, tangy, and savory.
4.
Achieve Smoothness: For the silkiest filling, some chefs press the mashed yolk mixture through a fine-mesh sieve before mixing in the other ingredients, though vigorous mashing usually suffices.
5.
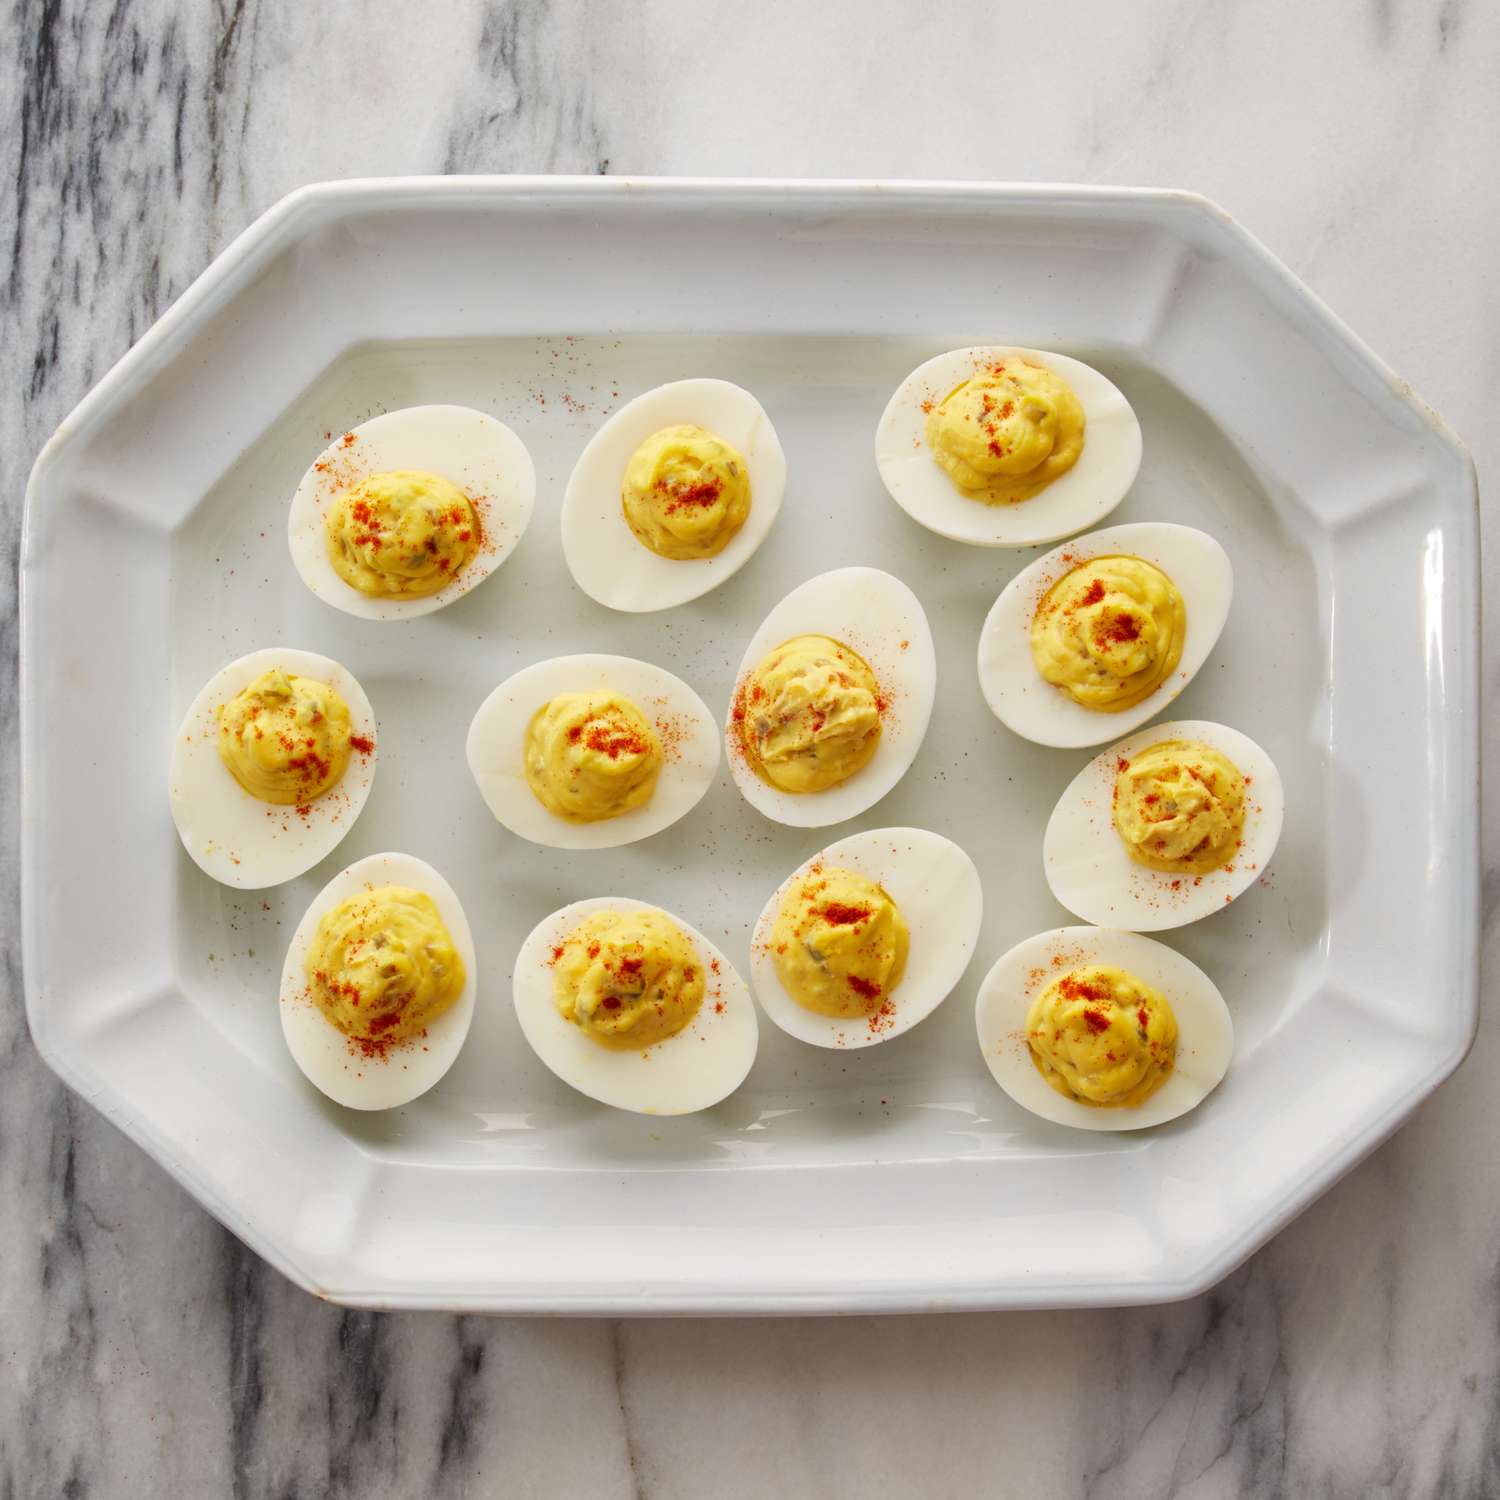
Fill and Garnish: Spoon or pipe the filling back into the hollowed-out egg white halves. For a professional look, use a piping bag with a star tip. Garnish your
classic deviled eggs with a sprinkle of paprika (sweet or smoked), fresh chives, dill, or a tiny sliver of pickled jalapeño for a hint of heat.
Conclusion
Kathy Casey's wisdom transcends mere recipes, offering a profound understanding of the fundamental techniques that elevate simple dishes to extraordinary ones. By embracing her secrets – using older eggs, centering yolks, employing the cold water start and immediate ice bath, and perfecting your peeling strategy – you'll transform your deviled egg experience from frustrating to consistently fantastic. No more torn whites, no more chalky yolks, just beautiful, creamy, and irresistible
classic deviled eggs that will be the star of any spread. Armed with these insights, you're not just making deviled eggs; you're mastering an art form, one perfectly peeled shell at a time.